How to Open a Volvo Key Fob?

There are actually two different things people mean when they say “open the fob.” One is popping out the small metal key hidden inside. The other is cracking open the whole plastic shell to get at what’s underneath. They use different mechanisms, and knowing which one you need saves you from prying at the wrong seam.
TL;DR
- Most Volvo fobs have a sliding latch near the key-ring loop that releases the hidden emergency key blade, separate from opening the whole shell.
- Opening the full shell (for battery access or shell swaps) uses a different mechanism depending on your fob’s age: a pry seam, a twist-hatch, or occasionally a small screw.
- Special key colors (orange, red) have shells that match their release slider color, so you can identify them even with the shell removed.
- Sealed waterproof “sports keys” aren’t designed to open at all and require cutting the glued seam, which voids their water resistance.
- Always identify your fob’s release mechanism first rather than assuming every Volvo fob opens the same way.
Quick answer: if you just need the hidden key blade, look for a small slider near the key ring and pull. If you need the full shell open, check for a pry seam, a twist-hatch marked “open/close,” or a small screw, since the mechanism varies by fob generation.
Step 1: Releasing the Hidden Key Blade (Most Common Reason)
This is the most frequent reason people search for this. You don’t need the fob’s battery to be dead to want this key. It’s your only way to unlock the driver’s door manually if the remote signal ever fails.
Steps:
- Hold the fob with the Volvo logo facing you.
- Locate the small slider near the key-ring loop.
- Slide it toward the loop to release the cover or catch.
- Pull the metal key blade straight out.
Quick Tip: If the blade feels stuck, don’t force it. Gently wiggle it while holding the release slider, or add a drop of light lubricant to the release mechanism if it’s been years since it was last used.
To reinsert: line the blade back up with its slot and push down until it clicks into place. It should sit flush with the fob body when properly seated.
Step 2: Opening the Full Shell
This is a separate task from removing the key blade, though on most fobs you’ll need the blade out of the way first, since it often sits in the same cover panel you’re about to open.
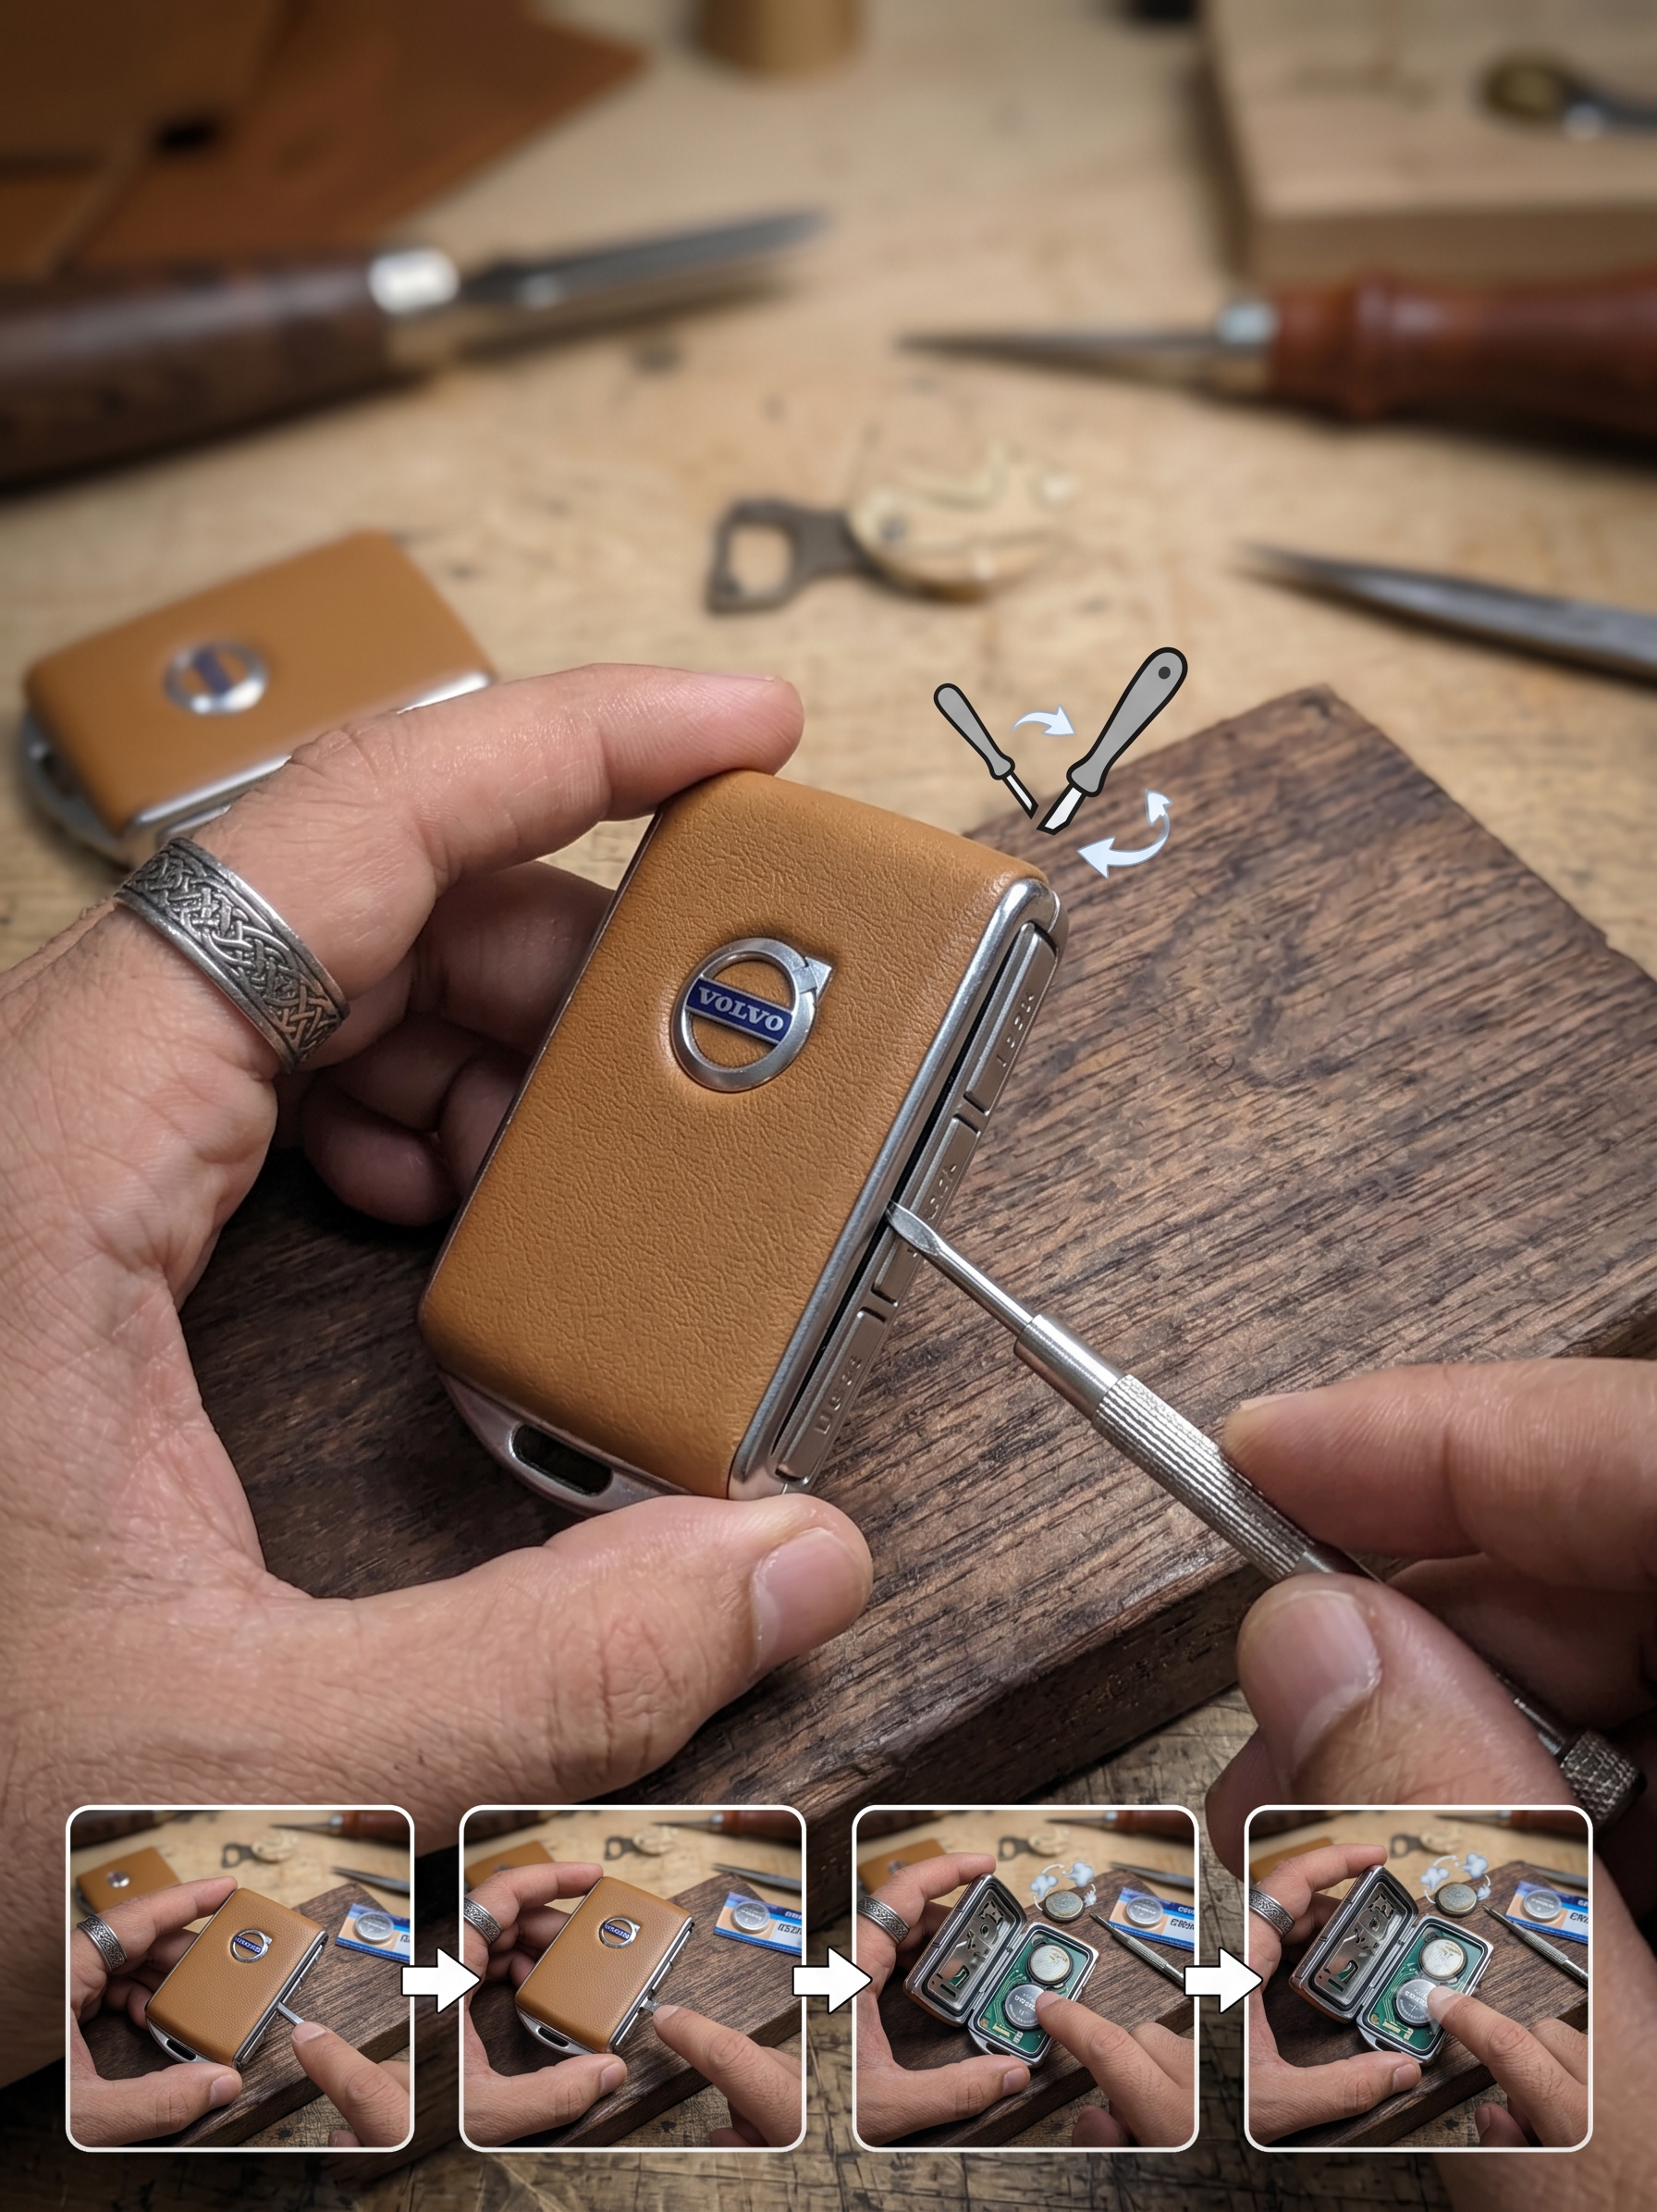
Method A: Pry-apart seam (most common on current rectangular fobs)
- Locate the seam running along the edge of the fob, usually a slightly wider gap at one corner
- Insert a small flathead screwdriver, coin, or the removed key blade into that seam
- Twist gently to separate the two halves, working around the perimeter rather than forcing one spot
Method B: Twist-hatch (used on some fob generations)
- Look for a circular section near the battery compartment marked with “open” and “close” arrows
- Use a coin or flathead screwdriver to rotate the hatch from “close” toward “open”
- Lift the hatch away once aligned
Method C: Small screw (older or specific remote styles)
- Locate a small screw on the back panel of the fob
- Remove it with a small screwdriver before attempting to separate the shell
- Set the screw aside carefully, since it’s easy to lose
Expert Insight: Don’t assume your fob uses the same method as a video or guide you found online, since Volvo has used at least three distinct shell-opening mechanisms across different fob generations. Look at your specific fob for a seam, a hatch, or a screw before reaching for a tool.
Real-world scenario: You watch a video showing a simple pry-apart seam, but your fob actually has a twist-hatch design. Forcing a screwdriver into a hatch mechanism can crack the plastic, so a thirty-second visual check of your actual fob before starting saves you an unnecessary repair.
Special Cases: Colored Keys and Sealed Fobs
Orange and red special keys: Volvo has offered special-purpose keys, including a “Red Key” designed to limit a car’s top speed and audio volume for less experienced drivers. These use the same internal components as a standard key but different colored shells, and the shell’s release slider matches the shell color, so you can identify a special key even with the shell removed.
Sealed waterproof “sports keys”: These compact, buttonless key tags are intentionally sealed for water and dust resistance, which means they don’t have a pry seam, hatch, or screw at all. Opening one means cutting through a glued joint, which permanently removes its water resistance. This isn’t a routine DIY task the way a standard fob’s shell is.
| Fob Type | Opening Method | Notes |
|---|---|---|
| Standard rectangular fob (current models) | Pry-apart seam | Most common; use a coin, screwdriver, or the key blade itself |
| Some earlier fob generations | Twist-hatch marked open/close | Rotate before lifting; don’t force with a screwdriver |
| Certain remote styles | Small screw | Remove screw first, then separate halves |
| Special colored keys (Red/Orange) | Same as standard fob | Shell color indicates key type even when removed |
| Sealed waterproof sports key | Not designed to open | Requires cutting a glued seam; not routinely reversible |
Pros and Cons by Reason for Opening
Retrieving the emergency key blade (most common need):
- Pros: Quick, doesn’t require tools beyond the slider itself, and doesn’t affect the fob’s electronics at all.
- Cons: If the slider mechanism feels stiff, it’s tempting to force it, which risks damaging the small retention clip.
Opening the full shell for battery access:
- Pros: A genuinely simple DIY task once you’ve identified the correct mechanism for your specific fob.
- Cons: Using the wrong method, like prying a twist-hatch design, risks cracking the plastic housing.
Attempting to open a sealed sports key:
- Pros: Technically possible with patience and a cutting tool.
- Cons: Permanently voids the water resistance the design was built around, and dealers may decline warranty replacement if they can tell it’s been opened.
FAQ
Do I need to remove the key blade before opening the full shell? Usually yes, since the blade’s cover panel and the shell’s opening mechanism often overlap on the same section of the fob.
How do I know which shell-opening method my Volvo fob uses? Look closely at the fob body. A visible seam suggests pry-apart, a circular marked area suggests a twist-hatch, and a visible screw head suggests the screw-based method.
Can I open a sealed Volvo sports key to change the battery? Not without cutting a glued seam, which permanently removes its water resistance. This style of key generally isn’t intended for user battery access.
What are the colored Volvo keys (orange, red) for? These are special-purpose keys, such as a Red Key that limits vehicle speed and audio volume, often used for younger or less experienced drivers sharing the car.
Is it safe to use a plastic pry tool instead of a metal screwdriver? Yes, and it’s often gentler on the shell’s finish. A plastic pry tool or an old gift card can separate a pry-apart seam with less risk of scratching the casing than metal tools.
Key Takeaways
- Releasing the key blade and opening the full shell are two different tasks with two different mechanisms.
- Shell-opening methods vary: pry seam, twist-hatch, or small screw, depending on your fob’s generation.
- Special colored keys share the same shell-opening method as standard fobs.
- Sealed sports keys aren’t designed to be opened without permanently affecting their water resistance.
- Always identify your specific fob’s mechanism before applying a generic guide or video.
What’s Next
Take a close look at your own fob’s seam, hatch, or screw today, so you know exactly which method applies before you actually need to open it in a hurry.